 Shopify
Table of Contents
The tap-shopify Meltano extractor pulls data from Shopify that can then be sent to a destination using a loader.


Alternative variants #
Multiple
variants
of tap-shopify are available.
This document describes the default singer-io variant,
which is recommended for new users.
Alternative variants are:
Getting Started #
Prerequisites #
If you haven't already, follow the initial steps of the Getting Started guide:
Installation and configuration #
Using the Command Line Interface #
-
Add the
tap-shopifyextractor to your project usingmeltano add:meltano add extractor tap-shopify -
Configure the settings below using
meltano config.
Next steps #
Follow the remaining steps of the Getting Started guide:
- Select entities and attributes to extract
- Add a loader to send data to a destination
- Run a data integration (EL) pipeline
If you run into any issues, learn how to get help.
Capabilities #
Settings #
These and other supported settings are documented below. To quickly find the setting you're looking for, use the Table of Contents at the top of the page.
Store Subdomain (shop)
#
-
Environment variable:
TAP_SHOPIFY_SHOP
The store subdomain, which can be derived from your Shopify admin URL.
If your admin URL starts with https://my-first-store.myshopify.com/, your store subdomain is my-first-store.
How to use #
Manage this setting using
meltano config or an
environment variable:
meltano config tap-shopify set shop <shop>

export TAP_SHOPIFY_SHOP=<shop>
Private App API Password (api_key)
#
-
Environment variable:
TAP_SHOPIFY_API_KEY
A Private App API Password or API Key generated using OAuth
How to get #
Create private app #
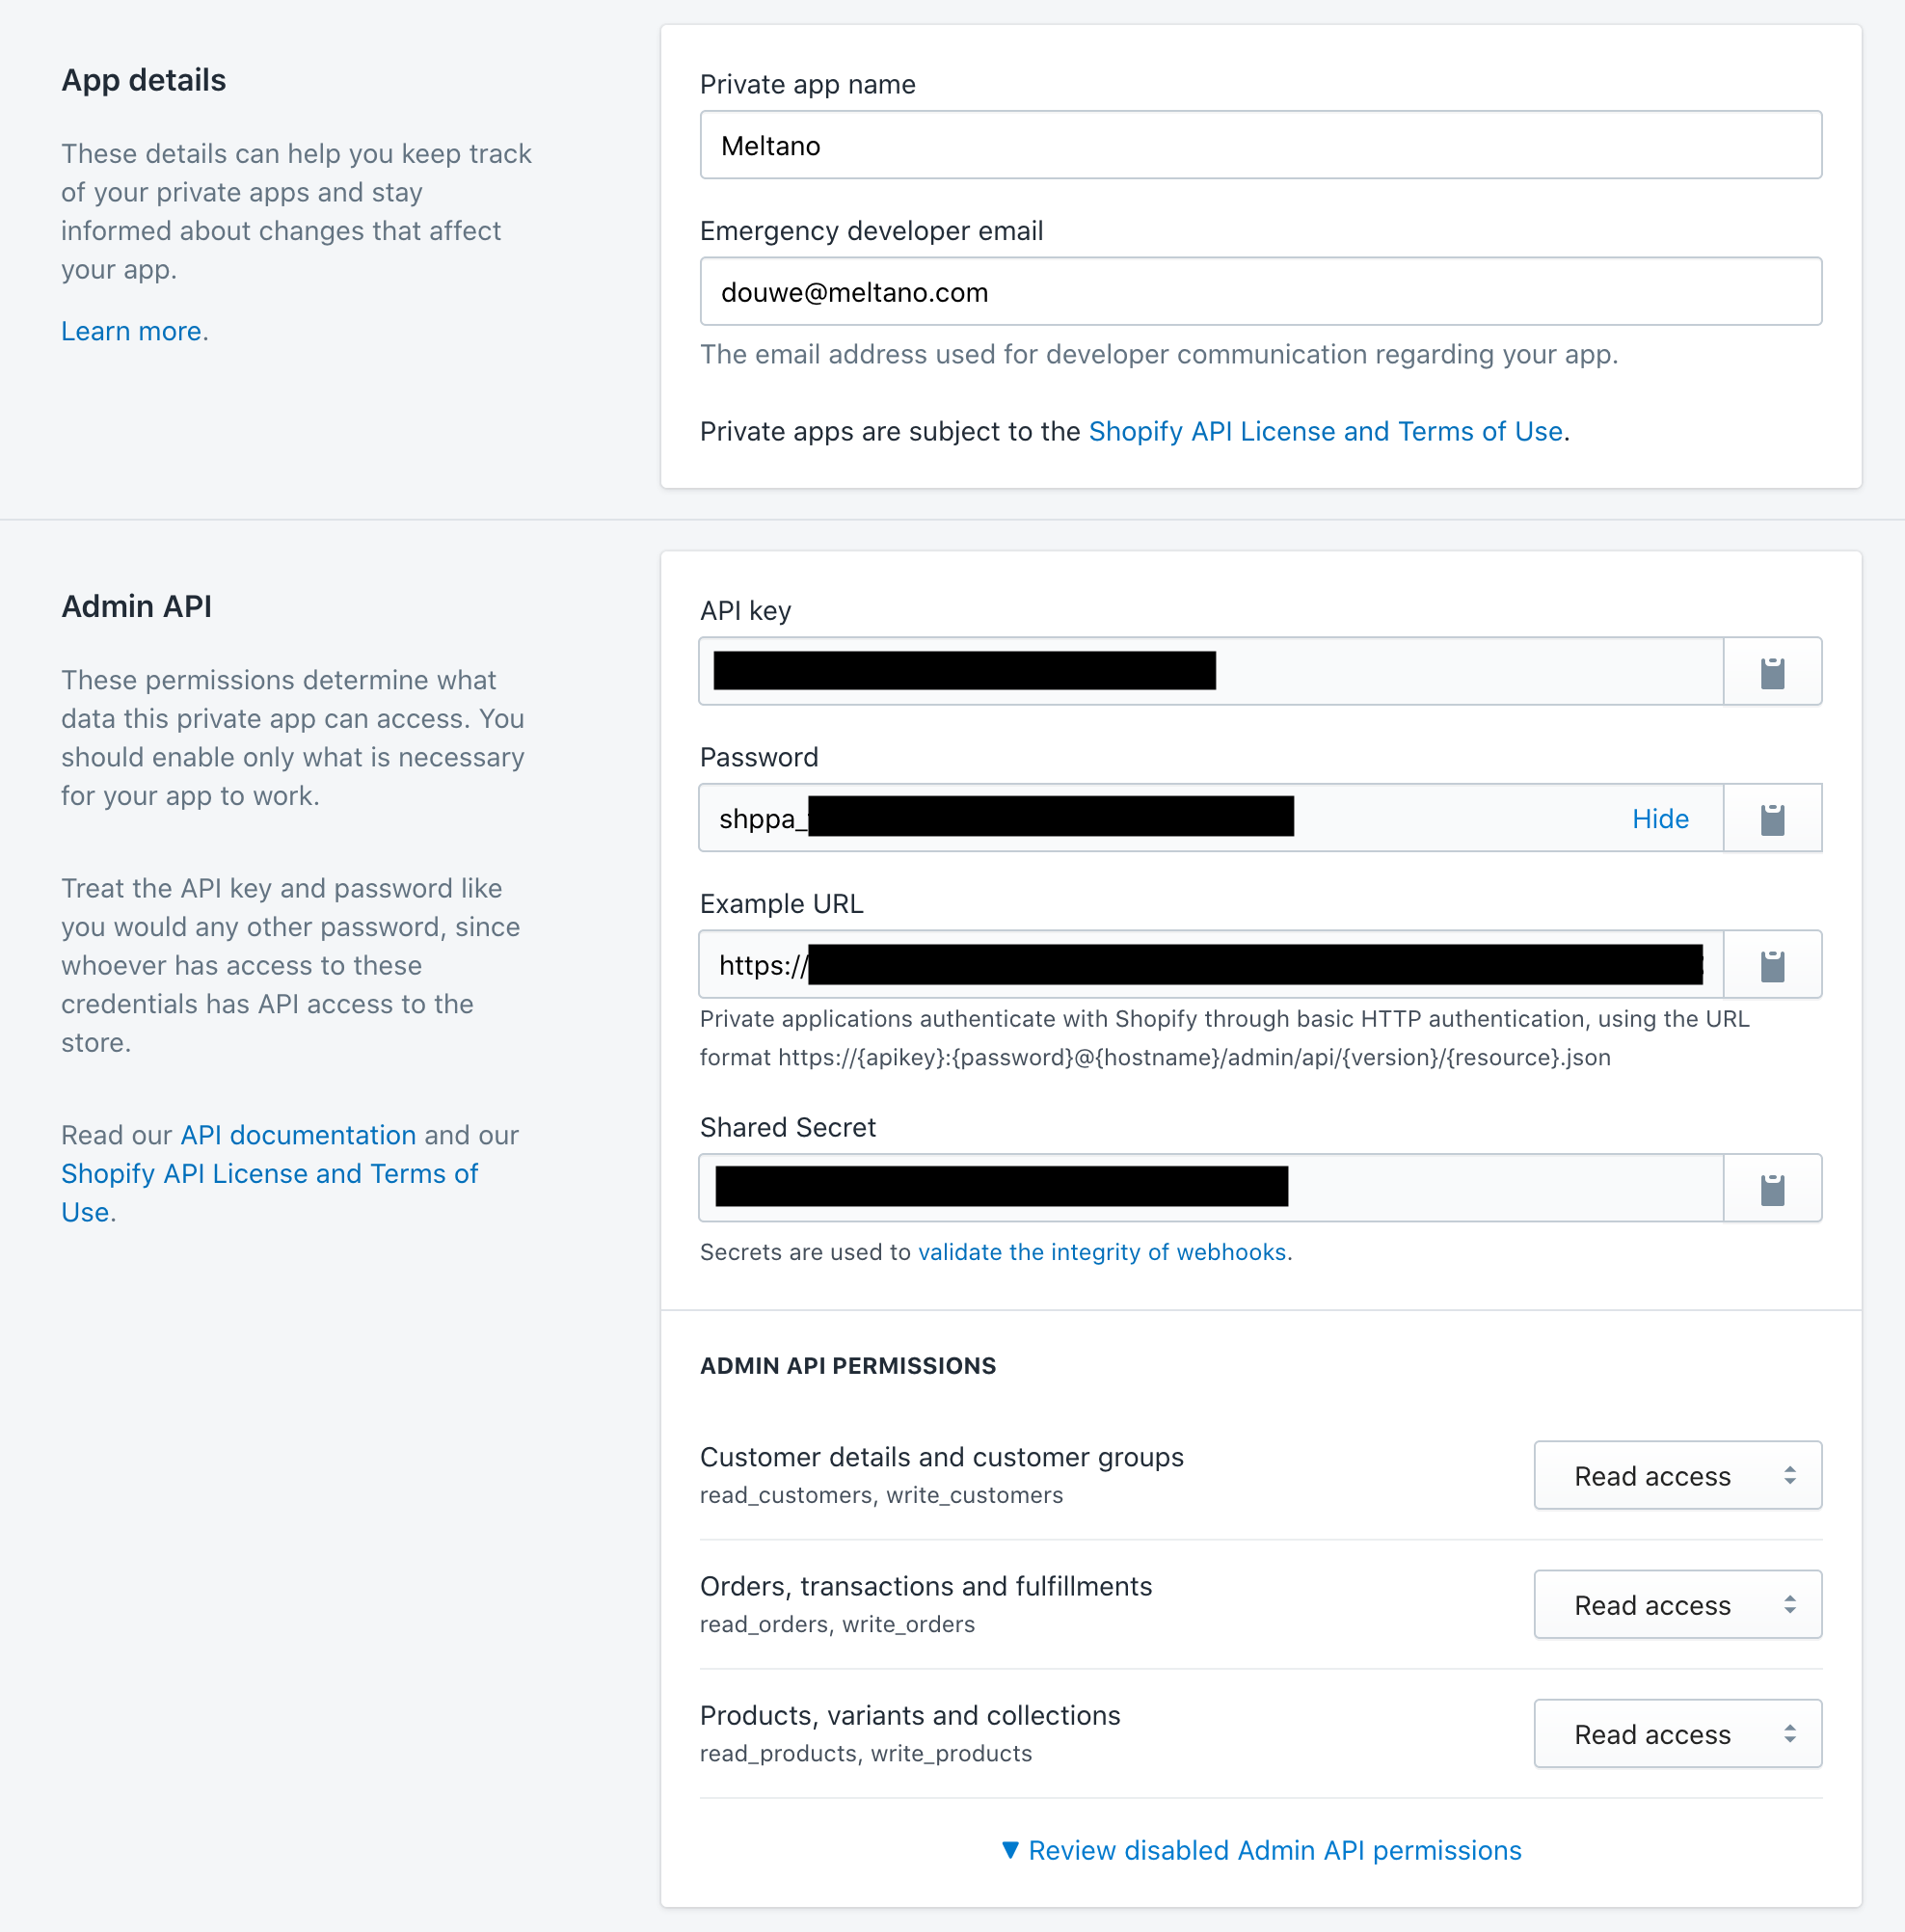
First, you will need to create a Private App:
- Log in to your Shopify store admin at
https://<store subdomain>.myshopify.com/admin - Click “Apps” in the sidebar on the left
- On the bottom of the page, click “Manage private apps” next to “Working with a developer on your shop?”
- Click the “Create a new private app” button
- Enter a “Private app name” of your choosing, e.g. “Meltano”
- Enter your email address under “Emergency developer email”
- In the “Admin API” section, click “▼ Review disabled Admin API permissions”
- Choose “Read access” rather than “No access” in the access level dropdowns for the following permissions:
- Products, variants and collections -
read_products, write_products - Orders, transactions and fulfillments -
read_orders, write_orders - Customer details and customer groups -
read_customers, write_customers - Click “Save”
- In the modal that appears, click “I understand, create the app”
Find your API password #
Now that your app has been created, we can acquire the password Meltano will use to authenticate with the Shopify API.
- In the “Admin API” section on the private app details page, find the “Password” field and click “Show”
- The value that appears (starting with
shppa_) is your API password. You can copy and paste it into the Meltano data source configuration.
How to use #
Manage this setting using
meltano config or an
environment variable:
meltano config tap-shopify set api_key <api_key>

export TAP_SHOPIFY_API_KEY=<api_key>
Start Date (start_date)
#
-
Environment variable:
TAP_SHOPIFY_START_DATE
Determines how much historical data will be extracted. Please be aware that the larger the time period and amount of data, the longer the initial extraction can be expected to take.
How to use #
Manage this setting using
meltano config or an
environment variable:
meltano config tap-shopify set start_date YYYY-MM-DDTHH:MM:SSZ

export TAP_SHOPIFY_START_DATE=YYYY-MM-DDTHH:MM:SSZ
Looking for help? #
If you're having trouble getting the
tap-shopify extractor to work, look for an
existing issue in its repository, file a new issue,
or
join the Meltano Slack community
and ask for help in the #plugins-general channel.
Found an issue on this page? #
This page is generated from a YAML file that you can contribute changes to. Edit it on GitHub!